Pages

Wednesday, February 22, 2012

Literally a "Pinspiration"

I stumbled across a good idea on Pinterest recently and as soon as I saw the picture I went to my scraps box and whipped up this pincushion in 15 minutes.

I now have a pinterest inspired pincushion on my sewing machine. A True Pinspiration.


I only checked afterwards, that the original idea used ribbon to attach to the sewing machine, but I used elastic and a buttonhole.

Very happy!


Every sewer knows the perils of pins! My pins always fall on the floor or spike my fingers as I try to get them out of my pinbox. This way, I have a pincushion attached to my machine which also looks really cute and is very functional!

How to make:
1. Measure elastic to fit around machine.
2. Measure and cut thick fabric that folds in half to fit front panel of machine. Add an extra 4cm for the buttonhole panel. My fabric was 14x12cm which I folded to 14x6.
3. Fold the fabric and sew in the elastic on the short side of the folded fabric.


Continue sewing the longer side so you have 2 sides sewn and one shorter side left open.
4. Turn inside out and stuff with some stuffing. I stuffed about 11cm into the tube which is the measurement of the front panel of my machine.
5. Stitch a seam to hold the stuffing in - leaving about 3cm for the button hole section. My seam was at 11cm - the same as the front panel of my machine. The seam separates the stuffing from the buttonhole panel.


6. Turn in the raw end and stitch. Put in your buttonhole. Or if you can't, then a bit of Velcro or a press stud would work.

7. Sew the button to the end of the elastic and attach to the machine.

Done.

Thursday, January 26, 2012

Lucky Finds

One of my favorite thrills is finding a discarded piece of junk by the side of the road, and knowing that I can give it a new lease on life!

I was recently driving with my daughter and we spotted this disgusting foot stool on the nature strip.


It even had an adjustable feature for angling the cushion.


We did an illegal U-turn and checked that it was in reasonable working order - aside from a very saggy seat cushion, so we packed it into the boot of the car.
A couple of days later, we decided to give it a makeover.

We first took out the staples and removed the seat cushion. This is how it looked inside:


It actually had CARDBOARD rather than foam!! No wonder it was so saggy.

So, our materials list was:


We popped into one of our favorite fabric stores Chee Soon & Fitzgerald where my daughter picked out a lovely floral linen fabric. Cost $50.00 - a bit of a splurge but I figured if it didn't work out I could make something else with the fabric. We then went to
The Foam Booth where we got our foam seat cushion supplied and cut to size for $13.
Then went in to Porters Paints to get a good quality paint. I bought a couple of small sample pots $5 each.

The reupholstering actually didn't take too long once we got started.
I saved the outer wooden edge and cut an extra piece of wood to add strength to the center of the cushion.


Then we covered the foam and wood frame with wadding and stapled it together with the staple gun.


Then I wrapped the wadding with a spare piece of fabric to give strength to the outer layer of fabric.


I finished the edges with some strong upholstering thread and a running stitch as there was too much thickness for the staple
gun.
Then covered the seat with the linen fabric gathering the edges again in the corners.


Cut off the excess fabric and put the cushion aside while painting the wooden frame.
We sanded the frame and then painted it - only needed one small sample pot! Rubbed back some of the paint after it dried with methylated spirits and a rough rag. The whole job took about 3 hours - including the painting!


We are thrilled with the results and love our new little quirky blue footstool!!

- Posted using BlogPress from my iPhone

Friday, December 30, 2011

Moroccan Beading & Henna Party

I recently facilitated a Morrocan Beading Bar for a pre wedding Henna Party. The Henna Party is a Middle Eastern custom where the bride and groom to be, are blessed through prayer and song, and is a beautiful ceremony including Henna Tattoos for all the guests and the bridal families.

My Beading Bar was a huge hit with all the guests including the adults young and old, male and female, and the few kids who were there. I supplied a beautiful range of crystal, silver, pearl, stone, bronze beads which meant that the bracelets and anklets that everyone made looked so good!


I restored an old printers tray I had lying under my studio table to hold all the beads. I also sourced some wooden and silver bowls at some local vintage markets to hold assorted beads. I made a tree from wire and paper mâché to display all the sample bracelets that I'd made. And I painted some terracotta dishes for the guests to use as their bead trays.


Some of the guests were surprised to find that they were able to make something so pretty with a few beads and a bit of patience.

All in all, a big hit.


- Posted using BlogPress
from my iPhone

Tuesday, December 20, 2011

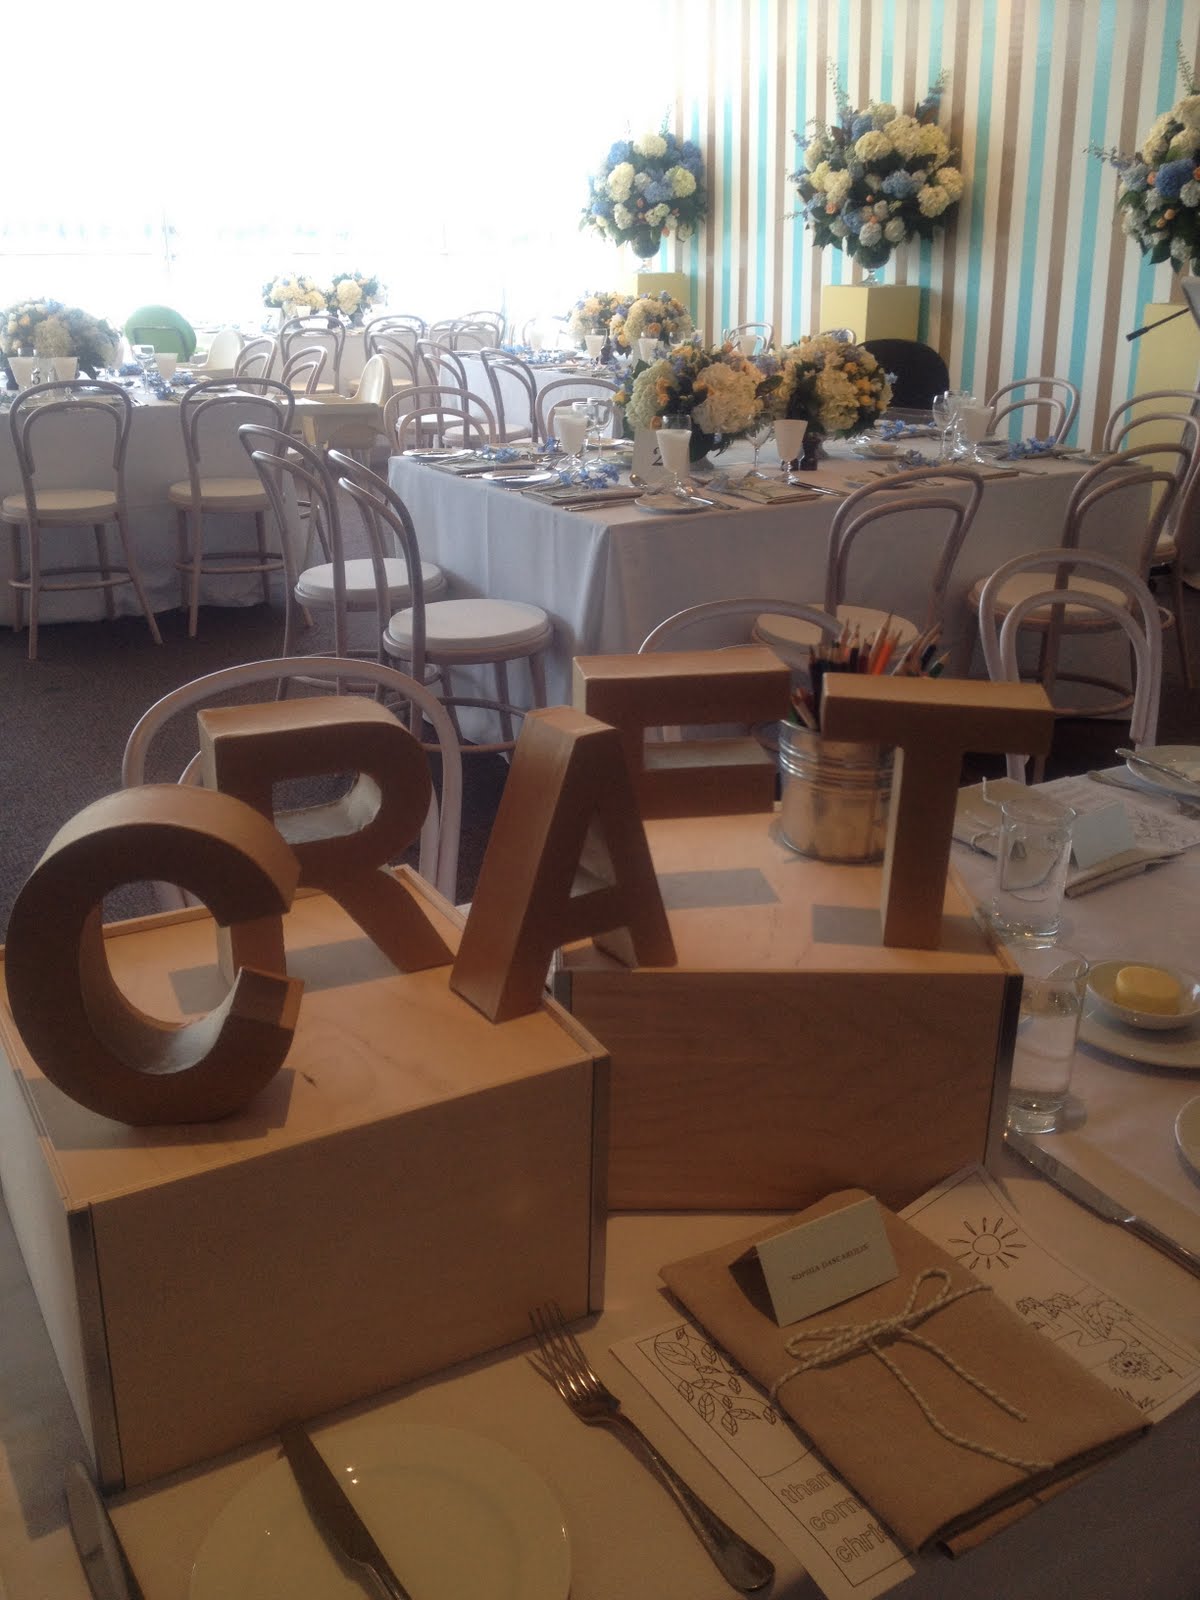
A Christening with a Difference


I've never been asked to work at a Christening before... but there's always a first, and this was it.

A very classy event, with a stylist, a beautiful venue, a band, catering and me!

I had a young crowd to please so we did some wet/dry pastel painting on canvas, beading, colouring in (on a custom designed personalised placemat by me especially for the event), photo frame and treasure box making. The brief was to keep things as 'clean' as possible, and I'm happy to say that the white starched table cloths had more stains from the tomato sauce and chips than they did from the art making!

It was a challenge doing the art at the lunch table, and I also had to set up a display on the lunch table to fit in with the room decor, but the event went beautifully and we managed to keep the kids happy and busy between 11am and 4pm! So the client was thrilled and so were the kids.

89 Kids on a Rainy Day

I was booked to facilitate and design some activities at a large party at Nielsen Park Kiosk recently, with many families invited. The kids had lunch and then had the option of coming to my 'art studio' which I'd set up in a gorgeous hall or going to the beach for a swim. Problem was, the rain started. So all the kids came in to the studio at once! My well thought out plan went into meltdown and it was all hands on deck for the first 15 minutes of chaos! After that, it settled down and the event went really well. Luckily, there was a microphone, so I was able to be heard above the mayhem, and explain to the kids how the afternoon would pan out! There were 89 kids from ages 4-17. I had 3 activities organised including tie dying singlets - for all of them, painting and decorating a shadow box for the 4-6 yr olds, and making a "family boat" canvas for the 6+ kids. The brief was to create things with an earthy Hamptons Design feel... so I used lots of neutral colours, driftwood, metals, twine, and natural elements including shells, and starfish. At the end of the day, the only thing that matters is that the kids have a ball - and they did.

This is the Family Boat Canvas - the kids painted a background, and a wooden word, then made a boat using tin, driftwood, wire, metal mesh, and various tools. You can't see so well in the picture, but the family name was embossed onto the tin sail using metal punches. It looked really good I must say!.


My studio display corner!